Print-Ready Artwork Checklist: 12 Things to Check Before You Send Your File
A 12-point checklist for getting a file ready to print: format, resolution, size, background, fonts, color, bleed and what to send. You do not have to do it alone, because we prepare the file for you.
The short answer: print-ready artwork is a sharp, original file saved as a PNG (or an SVG, AI, EPS, PDF, PSD or high-resolution JPG) at its final print size. Aim for 300 DPI and treat 150 DPI as the minimum, keep the background transparent when the design needs it, proofread every word, and add bleed to anything that gets trimmed. Under 150 DPI, a print is likely to look blurry.
You do not have to get all of this right on your own. At VS Print Studio in Houston we prepare the print-ready file at the right size and canvas, create the design when you only have an idea, and show you a mockup. Nothing is printed until you approve it. The 12 checks below show what a good file looks like, so you can avoid surprises.
The 12-point print-ready artwork checklist
Save this list or take a screenshot. Each point is explained below, with why it matters and the quickest fix.
- Format: PNG (best), SVG, AI, EPS, PDF, PSD or a high-resolution JPG
- Resolution: 300 DPI at the final print size, 150 DPI at the very least
- Size: built at the real print size or larger, never smaller
- Original: not a screenshot, and not a copy that was forwarded or compressed
- Background: transparent when the design needs it, with no white box
- Text: every word, number and accent proofread
- Fonts: converted to outlines, embedded or sent along
- Color: you know screen colors can shift a little in print
- Garment: the design has contrast on the shirt color
- Trim: bleed and a safe margin on cards, flyers and anything that is cut
- File names: clear, with one design per file
- Details: item, sizes, quantity, placement, exact text, colors and date included
Do you have to prepare the file yourself?
No. Preparing the file is our job. Send what you have and we build the print-ready file for your item, so you do not need to worry about DPI, templates or bleed. This checklist is for when you already have a file and want it to print as well as it can.
There are three ways to start, and the checks matter differently in each:
- I have my design. Send the best file you have. We check size, resolution and colors and fit it to the exact canvas of your item. All 12 checks apply.
- I have an idea. Describe it, or send a photo, a sketch or a reference. We turn it into a design and you approve it. Checks 6, 8 and 12 matter most: exact text, colors and details.
- I have nothing yet. Tell us the occasion, the name or the business, and we create the design from scratch. Start with check 12.
Checks 1 to 4: is the file itself good enough?
1. Which file format should you send?
Send a PNG whenever you can. It keeps every pixel and can have a transparent background. For logos, a vector file (SVG, AI or EPS) is even better because it stays sharp at any size. We also accept PDF, JPG and PSD when the resolution is high.
| Format | Good for | Watch out for |
|---|---|---|
.png | Most designs, with a transparent background | It is still pixels: a small PNG stays small |
.svg, .ai, .eps | Logos, lettering and flat illustrations, sharp at any size | Text that is not outlined (see check 7) |
.pdf | Cards, flyers and layouts | A PDF can hold vector shapes or just a picture of them |
.jpg | Photos, if the resolution is high | No transparency, and it loses some detail each time it is saved again |
.psd | Layered Photoshop designs, if the resolution is high | Missing fonts or hidden layers, so add a flat preview |
Not sure which of your files is vector? Our guide to vector vs raster images has a simple zoom test.
2. Is the resolution high enough?
Aim for 300 DPI at the final print size. 150 DPI is the minimum: usable, but some designs lose sharpness. Below 150 DPI, the print is likely to look blurry or pixelated.
The easiest way to check is in pixels. Multiply the print width in inches by 300. A design that will print 12 inches wide needs about 3600 pixels across. At the 150 DPI minimum you need half of that, 1800 pixels.
If the file is too small, look for a bigger original. Enlarging a small image in an editor makes it bigger, not sharper. Our guide to what DPI you need for printing has more worked examples.
3. Is the file the right size?
Build the canvas at the real width and height of the print, at 300 DPI. For a large adult shirt that means 12 inches wide, or 3600 pixels. Print width changes with the garment size, from 10.5 in on a small to 14 in on a 3XL, so a design that looks balanced on one size can look lost or crowded on another. We set the exact size for every garment, and our t-shirt print size chart lists each one.
Four habits keep this simple:
- If you are unsure which sizes you will order, build for the biggest one. Shrinking a sharp file costs nothing, while stretching a small one always shows.
- Resize from a corner so the proportions stay locked. A stretched logo looks wrong even when it is sharp.
- Send the design the way it should read on the finished item. Do not mirror it yourself.
- Look at the design at its real size. A left chest print is only 3.5 to 4 in wide, and thin lines and tiny text are the first things to disappear.
4. Is it the original, not a screenshot?
Send the file itself, not a screenshot. A screenshot captures only the pixels your screen was showing. Pictures saved from social media, forwarded in chat apps or pasted into a Word or PowerPoint document are often shrunk and compressed as well, and heavy compression leaves fuzzy halos around edges. That lost detail cannot be recovered.
Go back one step instead:
- Use the file your designer sent, or the first email attachment, not the forwarded copy.
- Send photos straight from your phone’s camera roll, uncropped. We crop and place them for you.
- On WhatsApp, send images as a document so the app does not compress them. Email works too.
- Send the design itself, not a picture of it on a shirt or a screen.
A photo from a recent phone is usually large enough, as long as no chat app has compressed it.
Checks 5 to 8: is the design clean?
5. Is the background transparent?
A white box around a logo prints as a white box. On a colored shirt that box shows, because the white in your file is treated as part of the design. A transparent background tells us where the design ends and the garment begins.
To check, open the file in an image editor or viewer that shows transparency. A gray-and-white checkerboard behind the design usually means the background is transparent, while a solid white box means it is not. JPG files cannot be transparent at all.
To fix it, export the design as a PNG with a transparent background. If you cannot, send the file anyway and tell us. We remove backgrounds when we can. Our guide to removing a background for printing shows several ways to do it yourself.
6. Is every word, number and accent correct?
A typo printed on a whole group of shirts is the costliest mistake on this list, and no software catches a wrong phone number. Proofread like this:
- Read every line out loud, then read it backward one word at a time, so your eye stops auto-correcting.
- Check phone numbers, dates, addresses and websites digit by digit, and names letter by letter.
- In Spanish, check accents, the letter ñ and the opening marks ¿ and ¡. A missing accent turns papá (dad) into papa (potato), and some fonts drop these characters entirely.
- Ask someone else to read it.
- Type the exact text in your message too, so we can copy it instead of reading it off an image.
The mockup is your last proofreading round. It is the version that gets printed, so read it again, letter by letter, before you approve it.
7. Are the fonts outlined?
Live text in a design file depends on the fonts installed on the computer that opens it. If we do not have yours, the program swaps in another font, and the spacing and the look change.
Pick one of these fixes:
- Convert the text to outlines (curves or shapes). In Illustrator that is Type, then Create Outlines. In Photoshop it is Type, then Convert to Shape.
- Export a PDF with the fonts embedded.
- Export a PNG, which turns the letters into pixels. Just make it big enough (check 2).
- Send the font file along with the design. Some fonts are licensed for personal use only, so check the license if the design is for something you sell.
Keep your editable original for yourself and send us the outlined or exported copy.
8. Will the colors look the same in print?
Not exactly, and that is normal. A screen makes color with light, while a print uses ink, dye or thread, so colors on a screen can look slightly different when printed. We match them as closely as the product and the method allow, and the mockup shows you the result before anything is printed.
- Bright, glowing colors such as neon blues, greens and oranges shift the most. Deeper, softer colors usually stay closer.
- Your screen changes what you see. Turn off night mode, set the brightness to normal and, if you can, compare on a second device.
- If one color matters, like a brand color, send its hex code or a physical reference such as a printed card. A code gives us a target, not a promise, because the final shade also depends on the item and the method.
- You do not need to convert your file to another color mode for us. Send it the way you made it.
For the full explanation, read RGB vs CMYK for printing.
Checks 9 to 12: is it right for the item?
9. Does the design stand out on the garment color?
Bright colors show best on light items, and on dark garments we adjust the design so it stays visible. You can help by thinking about contrast before you send the file.
| Garment | What works | What to avoid |
|---|---|---|
| White or light shirt | Dark and saturated colors, black text | Pale yellow, light gray and white artwork |
| Black or dark shirt | White, light and bright colors | Black, navy and dark gray artwork, thin dark outlines |
| Mid-tone shirt (gray, red, royal blue) | Bold contrast, either very light or very dark | Colors close to the shirt color |
If your logo is dark, send a white or light version for dark shirts. A thin outline or a shape behind the lettering can also rescue a design that would otherwise blend in.
The method matters too. Sublimation only shows on white or light polyester, so dark shirts usually go to DTF, where a white layer under the color keeps it bright. Our comparison of DTF, sublimation and screen printing explains why, and designing for dark and light garments goes deeper into outlines and contrast.
10. Does it have bleed and a safe zone?
Anything that is cut to size after printing needs both. Business cards and flyers are the usual cases, because cutting is never perfect. Bleed is the extra background that runs 0.125 in (about 3 mm) past the trim line on every side, so a small shift in the cut never leaves a white sliver. The safe zone is a margin of 0.125 in inside the trim line where text and logos stay, so nothing gets clipped.
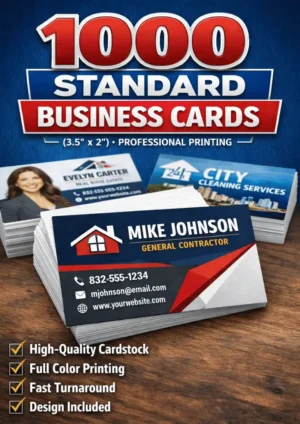
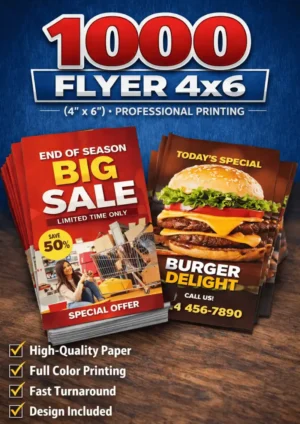
A 3.5 x 2 in business card is built as 3.75 x 2.25 in with bleed, and a 4 x 6 in flyer as 4.25 x 6.25 in. Shirts are not trimmed, so they need no bleed. For mugs and tumblers, work inside the wrap size and keep important text away from the handle area and the seam.
We add bleed and safe margins for cards, flyers and anything that is trimmed, so you can send the design as it is. For more detail, read bleed and safe zone explained and our business card size and design guide.
11. Are the files named clearly?
Plain names help both of us find the right file. Avoid “final-FINAL-2” and “IMG_4821” when you send more than one file, and send the front and the back as separate files. Examples that work:
logo-full-color.pnglogo-white-version.pngshirt-front.pngshirt-back.pngnames-and-sizes.pdf
If you send several files, say in your message which one goes on which item and where.
12. Did you include the order details?
A good file still has to be matched to an order. To quote and prepare it right the first time, we need the item and its model, the sizes and quantity, where the design goes (front, back, left chest, sleeve or full wrap), the exact text, the colors you want and the date you need it. Tell us too whether you will pick up in Houston or want it shipped. The last section has a message you can copy and fill in.
Print-ready file sizes by item at 300 DPI
You never have to build these canvases yourself. Use them to judge your file: compare its width in pixels with the last column. Half of that number clears the 150 DPI minimum, and the closer you get to the full number, the better.
| Item | Print area | Canvas at 300 DPI |
|---|---|---|
| Adult shirt, front or back | 10.5 in (S) to 14 in (3XL) wide | 3150 to 4200 px wide |
| Left chest | 3.5 to 4 in | 1050 to 1200 px |
| Sleeve | 3 to 3.5 in | 900 to 1050 px |
| Business card, with bleed | 3.75 x 2.25 in | 1125 x 675 px |
| 4 x 6 in flyer, with bleed | 4.25 x 6.25 in | 1275 x 1875 px |
| 11 oz mug wrap | 8.5 x 3.5 in | 2550 x 1050 px |
| 12 oz stainless mug wrap | 9 x 3.5 in | 2700 x 1050 px |
| 16 to 20 oz tumbler wrap | 9.3 x 8 in | 2790 x 2400 px |
| 24 oz bottle wrap | 8.8 x 7.6 in | 2640 x 2280 px |
| 30 oz tumbler wrap | 10 x 7.5 in | 3000 x 2250 px |
| 40 oz tumbler wrap | 10.5 x 7.5 in | 3150 x 2250 px |
| Keychain | 2 in | 600 px |
| Pillow, 18 x 18 in | 18 x 18 in | 5400 px square (2700 px minimum) |
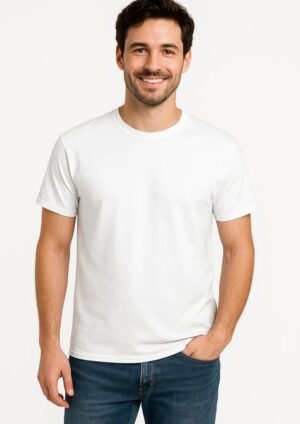
Youth and women’s cuts have their own, smaller print areas, and sizes can vary slightly between brands and models, so we confirm the exact print area for your item before printing. A shirt like our Gildan G500 Heavy Cotton tee uses the shirt rows, while the 1000 standard business cards and the 4x6 flyers use the bleed rows. Drinkware is covered in the tumbler and mug size guide.
What if the only file you have is small or blurry?
You are not stuck. Work down this list and stop as soon as you find a better file.
- Ask whoever made the logo or design for the original files: AI, EPS or SVG for a logo, or a large PNG or PDF. “The vector file and a transparent PNG” is a clear request.
- Search your email and chats for the first version you were sent, before it was forwarded.
- Ask the shop that printed your last shirts, cards or flyers. They may still have the file.
- If you made the design in an app, go back and download it again at the highest quality, as a PNG.
- Still nothing? Send what you have, even a photo of a sketch or a printed card. We tell you before printing whether it will hold up. Sometimes we can rebuild or enlarge it. If not, we suggest a better file or a smaller size.
Our guides on making your logo print-ready and turning a sketch into a print file cover the two most common cases.
How we can help with your file
Send us whatever you have: a finished file, a photo, a sketch or only a description. We check it, tell you honestly what to improve and prepare the print-ready file at the right size and canvas. With only an idea, we create the design. You see a mockup first, and nothing is printed until you approve it.
Most standard orders are ready in 2-5 business days after you approve the design. Larger or more complex orders may need more time, and the quote confirms the date. For urgent dates, message us on WhatsApp: selected items may qualify for rush production, depending on workload and artwork readiness. You can pick up in Houston or have it shipped across the U.S., and we answer in English or Spanish. Start with made-to-measure printing or our artwork guidelines.
Before you send: a message you can copy
Paste this into the quote form or into WhatsApp, fill in what you know and leave out what you do not. Even one line is enough to start.
Not sure about something? Write “not sure” and we will ask for the rest. If a file is too large for the quote form, send it on WhatsApp. Ordering for a team, a church or a family? Our guide to ordering custom shirts for a group has a longer brief.
Products mentioned in this guide
-
T-shirt
Gildan G500 Heavy Cotton™ 5.3 oz T-Shirt
$17.99 Select options This product has multiple variants. The options may be chosen on the product page
Frequently asked questions
Which file format is best for printing?
PNG is the format we recommend for most designs, because it keeps every pixel and supports a transparent background. For logos, vector files (SVG, AI or EPS) are ideal because they stay sharp at any size. PDF, JPG and PSD are accepted when the resolution is high. Avoid screenshots and heavily compressed images.
What resolution does my file need for printing?
Aim for 300 DPI at the final print size. 150 DPI is the minimum, and below 150 DPI the print is likely to look blurry or pixelated. In pixels, multiply the print width in inches by 300: a design that prints 12 inches wide needs about 3600 pixels across.
Do I have to prepare the file myself?
No. Send what you have, whether it is a finished file, a photo, a sketch or only a description, and we prepare the print-ready file at the right size and canvas. If something will not hold up, such as a very small image, we tell you before printing.
Can I send a screenshot or a photo from WhatsApp?
You can send it, and we will check it, but screenshots and compressed copies lose detail and often print soft. For the best result, send the original file. On WhatsApp, send images as a document so the app does not compress them.
Do business cards and flyers need bleed?
Yes. Anything that is trimmed after printing needs 0.125 in of bleed on every side, plus a safe margin for text. A 3.5 x 2 in card becomes 3.75 x 2.25 in with bleed, and a 4 x 6 in flyer becomes 4.25 x 6.25 in. We add bleed and safe margins for you.
What should I send with my file when I ask for a quote?
Send the item and the model if you know it, the sizes and quantity, where the design goes, your file or idea, the exact text, your colors and the date you need it. Say whether you will pick up in Houston or want it shipped. Missing something? Send what you know and we ask for the rest.
Practical guides from our studio in Houston, Texas. We prepare your print-ready file, show you a mockup and print nothing until you approve it. Questions? Message us in English or Spanish. About us
More guides for you
What Is Bleed in Printing? Bleed, Trim and Safe Zone Explained
What bleed, trim and safe zone mean, with the exact business card and flyer sizes (3.75 x 2.25 in and 4.25 x 6.25 in), what goes wrong without them and how to set them up.
What DPI Do You Need for Printing? 300 DPI Explained Simply
The plain answer to what DPI you need for printing: 300 at the final size, 150 as the minimum. With the pixel math for shirts, cards and tumblers, and how to check your own file.
Vector vs Raster Images for Printing: What’s the Difference?
Vector or raster, which one should you send? A plain-English guide to how each file works, a 30-second test to tell them apart, and what to do when your logo only exists as a small picture.
Tell us your idea — we make it real
Send your design, your idea or just a description. We prepare the file at the right size and personalize it for you — in English or Spanish, by message or on WhatsApp.